Friday, March 23, 2018

Overhead of Creating a new HttpClient per call/request - Exception : Unable to connect to the remote server System.Net.Sockets.SocketException: Only one usage of each socket address (protocol/network address/port) is normally permitted.

Exception : Unable to connect to the remote server System.Net.Sockets.SocketException: Only one usage of each socket address (protocol/network address/port) is normally permitted.

“As Per Microsoft documentation, HTTP Client is intended to be instantiated once and it should be reused thought the life of application.”

Let evaluate the above Microsoft document statement about HttpClient, if you are creating a new HttpClient instance it means one TCP/IP connection is established with Server


using System.Net.Http;
HttpClient client = new HttpClient();

Creating a new HTTPClient instance per request, it can exhaust the available TCP socket and server comes under heavy load.

There is limited number for connection pool on Windows Server, if you have already used available connection or exhaust the connection pool then you encountered error:

Unable to connect to the remote server
System.Net.Sockets.SocketException: Only one usage of each socket address (protocol/network address/port) is normally permitted.

Disposing HttpClient instance by Using Statement:
Using Statement in C# is used for Disposable object and, if object goes out of using scope, it is disposed.

HttpClient is also disposable object and if we use using statement to instantiate HttpClient and when it goes out of scope, it is being disposed.

using (HttpClient client = new HttpClient())
           {

           }

In Disposing of HttpClient it close the active TCP/IP connection with Server but due to delay on the network there is always waiting time from other side and If you create more HttpClient instances it means you opened more TCP/IP connections, it could be very costly and more waiting time process to dispose HttpClient instance.


Conclusion is that for creating HttpClient instance per request by using “using” statement it could be more problematic.

It is advisable to use the single instance of HttpClient per Web Service throughout application. You can manage the single instance of HTTPClient by using the singleton Patterns or static class.

public sealed class CommonHttpClient
    {
        private static HttpClient instance;

        private static object syncRoot = new object();

        public static HttpClient Instance
        {
            get
            {
                if (instance == null)
                {
                    lock (syncRoot)
                    {
                        if (instance == null)
                        {
                            var handler = new HttpClientHandler { UseDefaultCredentials                                        = true, Credentials = CredentialCache.DefaultCredentials };
                            var client = new HttpClient(handler, false)
                                         {
                                             BaseAddress = newUri(“http://localhost”)
                                         };
                            instance = client;
                        }
                    }
                }

                return instance;
            }
        }

    }


Thanks for visiting!!


Friday, March 16, 2018

Import Swagger APIs documentation into Postman

Swagger lovers can easily import APIs documentation information into Postman and Postman provides ability to import API information from Swagger directly.


below are steps :
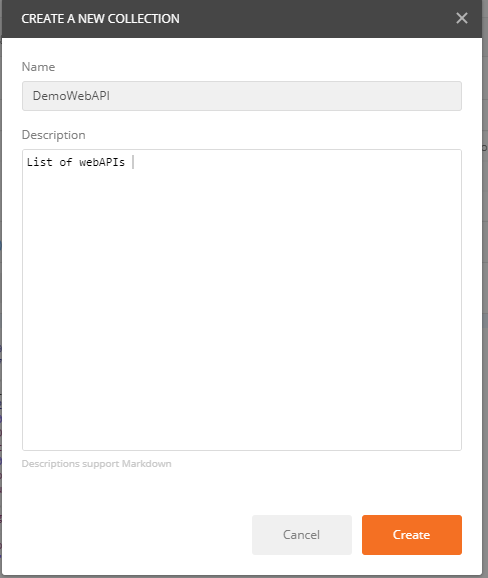
  • Create New Collection : 
   
  •     Click on Import button on top panel , Import Popup will be opened


                                                                     (Import Window)


now you can see list of imported API requests


Monday, March 12, 2018

The Lifecycle of an ASP.NET Web API

In this blog, we will discuss the life cycle of an ASP.NET Web API message, which travels from Server to client.

ASP.NET Web API is a .net framework which is used to build HTTP based Restful service and Web API is a lightweight service and supports broad range of clients (mobile app, web apps etc.) and it allows multiple devices to access data via API with any configuration settings.

Steps To Create ASP.NET Web API

Web API Request/Repose Processing Pipeline:

Life-cycle of WEB API

Http Server:  Gets request from host (IIS or Managed application).

Message Handler/Delegating Handler:  it is used before routing the request and these message handler arranged module in HTTP pipeline and each receives request and does some work and pass to next message handler in pipeline. Message handler can send response back without passing to next handler and you can use Message Handler to validate request and based on this, create response also.

Routing Dispatcher: Parse route information and depending on route dispatch request.

Controller Dispatcher : it creates instance of Web API Controller based on matched route

Authorization Filter: after controller instantiate, request pass through the authorization filters, if authorization filter configured in pipeline and it checks authorization of request, in case of fail, send back response directly.


Model Binding: controller calls web API Controller method, before that it set method parameters value, this is called model binding. We can defined own custom model binding to set action parameter value (asp.net web api parameter binding)

Action Filter: After Model Binding, if action is attributed with action filter, action filter will be invoked and it is invoked two times, One before action is executed and 2nd time, after action executed


Controller Action: controller action execute its code and on depend of result, it created HTTP Response.


Exception Handler: if any unhand-led exception is occurred, exception filer is execute, it can have common exception handling logic.

Tuesday, March 6, 2018

How to add Authorization Header (Custom Header) in Swagger UI

In this blog, we are going to discuss how to add custom header parameter (authorization header) in Swagger UI for ASP.Net web API.

We use request header (like authentication) to pass client information to web API but in Swagger UI, there is no any simple or straight way to add custom header parameter.
To add customer header parameter in Swagger UI, we need to implement IOperationFilter interface

internal class AuthorizationHeaderParameterOperationFilter : IOperationFilter
    {      
        public void Apply(Operation operation, SchemaRegistry schemaRegistry, ApiDescription apiDescription)
        {
            if (operation.parameters == null)
                operation.parameters = new List<Parameter>();

     operation.parameters.Add(new Parameter
            {
                name = "X-API-Token",
                @in = "header",
                description = "access token",
                required = true,
                type = "string"
            });
        }
    }

SwaggerConfig .cs :

public static void Register()
        {
            var thisAssembly = typeof(SwaggerConfig).Assembly;
            GlobalConfiguration.Configuration
                .EnableSwagger(c =>
                {
                    c.SingleApiVersion("v1""DemoWebAPI");
                    c.OperationFilter<AuthorizationHeaderParameterOperationFilter>();
                })
                .EnableSwaggerUi(c => { });
        }


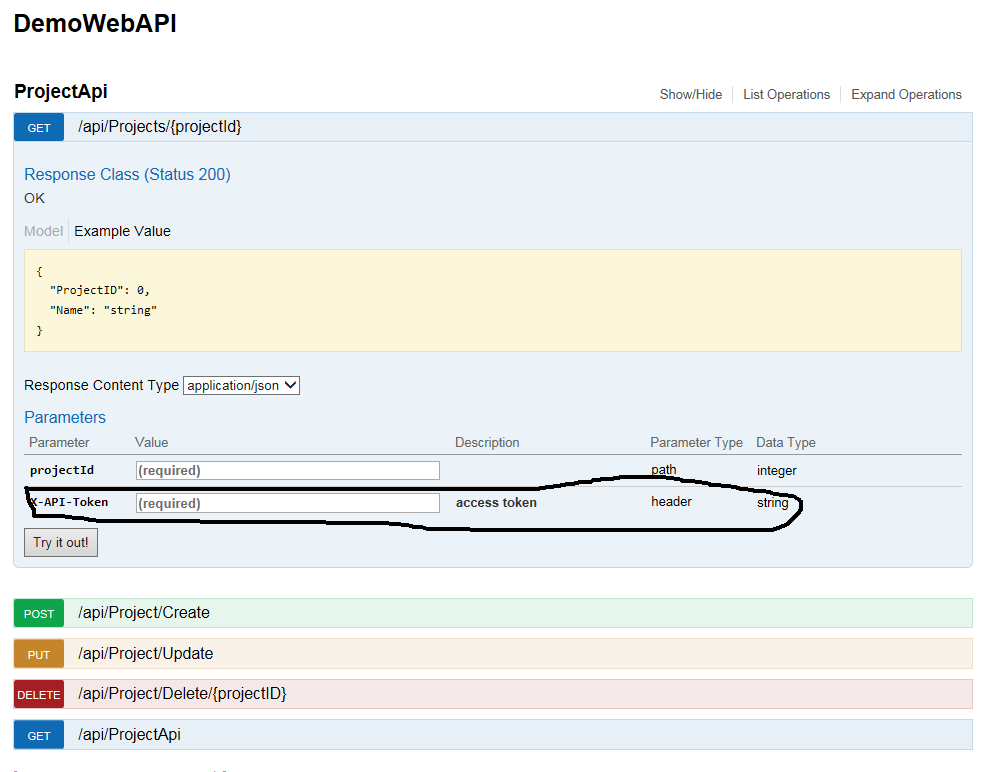
As below you can see, X-API-token as additional parameter for your Web API to take authorization token and pass to web API for user authentication 

Swagger UI Add Authorization Header (Custom Header)


Other swagger related posts:
·         Disable Swagger UI


Thanks for visiting!!

Wednesday, February 28, 2018

How to use Swagger in Web API

In this blog, we will discuss about web api documentation and will demonstrate basic steps how to setup swagger in web api project and also show how to test web api by submitting http request GET/POST/PUT via swagger UI.

Please read my previous blog when we discussed how to create a web api in ASP.NET MVC Application and describe basic steps to create an asp.net web api.

Swagger is API developer tools for the Open API Specification (OAS), enabling development across the entire API life cycle, from design and documentation, to test and deployment.

Definition -
Swagger is a simple yet powerful representation of your RESTful API. With the largest ecosystem of API tooling on the planet, thousands of developers are supporting Swagger in almost every modern programming language and deployment environment. With a Swagger-enabled API, you get interactive documentation, client SDK generation and discoverability.”


To add Swagger into WEBAPI Project, you need to perform only 2 steps

1.   Install SwashBuclkle open source project via Nuget.


Install SwashBuclkle Nuget Package

2.   Configure Swagger Config File :

 After package installed, you will find a new file ‘SwaggerConfig.cs’ under App_Start Folder

    
Swagger Config

public class SwaggerConfig
    {
        public static void Register()
        {
            var thisAssembly = typeof(SwaggerConfig).Assembly;

            GlobalConfiguration.Configuration
                .EnableSwagger(c =>
                    {             
                        c.SingleApiVersion("v1""DemoWebAPI");                 
                    })
                .EnableSwaggerUi(c =>
                    {
                        c.DocumentTitle("Demo Web API");

                    });
        }

    }
 
It is done J 

now build the web api project and run it.

Browser http://localhost:65096/swagger

Swagger UI documentation


Swagger allows you to submit HTTP request GET, HTTP POST, HTTP PUT against Web API

here is an an example 

Submit HTTP GET Request For /api/Projects/{projectId}


Swagger UI GET


Other swagger related posts:


·         Disable Swagger UI


Thanks for visiting!!

Unity Container Lifetime Scope of Instance of Registered Type

In this blog, we will discuss about lifetime scope of instance of register type created by Unity Container and how to manage it

Container.RegisterInstance(typeof(ProjectEngine), new ProjectEngine ())

By default, the RegisterInstance method registers existing object instances with a container-controlled lifetime [ContainerControlledLifetimeManager] it means that unity registers an object as a singleton instance.

By default lifetime for RegisterType method is TransientLifetimeManager, which creates new object of request type for each call.

Container.RegisterType<IProjectEngine, ProjectEngine>(); 

OR

Container.RegisterType<IProjectEngine, ProjectEngine>(new TransientLifetimeManager()); 
Unity Container have other lifetime managers so you can able to manage lifetime of created object differently.

Lifetime Manager
Description
TransientLifetimeManager
Unity Creates a new instance of request type for each call, when you call Resolve method
ContainerControlledLifetimeManager 
Unity creates a singleton object of request type on first call and it returns same object for subsequent Resolve call
HierarchicalLifetimeManager
Its same as ContainerControllerLifeTimeManager, only difference is that child and parent container creates its own singleton object and but both don’t share its singleton object
PerResolveLifetimeManager
It is same as TransientLifeTimeManager but it reuse same instanced object in the recursive object graph
PerThreadLifetimeManager
Unity Creates a singleton object per thread basis
ExternallyControlledLifetimeManager
It delegate to external source to manage the object and but for first resolve call, it creates object of requested type.

SQL Server - Identify unused indexes

 In this blog, we learn about the index usage information (SYS.DM_DB_INDEX_USAGE_STATS) and analyze the index usage data (USER_SEEKS, USER_S...