This blog explain how to create Web Performance and Load
testing Project in visual studio and it explains steps by steps how to perform load and
web performance testing of ASP.NET WEB API or Rest API. We will discuss about
the different pattern of load testing like constant and step load pattern
In the Enterprise edition of Visual Studio, Web performance and load test projects are available and you can install the load testing component
1. Create Web Performance and Load Test Project
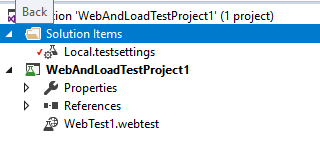
· Open the visual studio and choose Create a new project
· select the Web Performance and Load Test Project
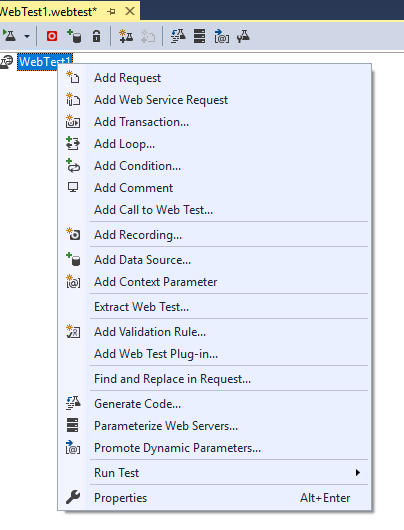
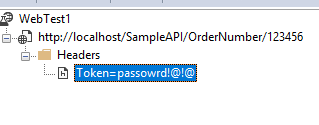
Provides the API URL
· Add Header, if required
· Add Query String, if required
Steps to create load test:
1. Right click on project node and choose the Add à Load test
2. “New Load Test Wizard” Options
There are two options
1. Cloud-based Load test
2. On –premises Load Test
If you want to run in local network and on local system, choose the On-premises load test and click on Next, ‘Run Setting’ screen will be appeared
3. Run Settings
In Load run setting, you can provide the total load test duration time along with warm-up duration time
Load test duration
Run duration: 10 mins
Warm –up duration: 30 secs
Click on Next, scenario screen will be appeared
4. Load Test scenario
You can give load test scenario name – ConstantLoad and click on Next button, Load Pattern screen will be appeared.
5. Load Pattern
There are two type of load patterns
· Constant Load
· Steps Load
In constant loan, the same loaded will be applied for all testing duration and load will not be changed.
In steps pattern, the load will be gradually increased after given step duration
We choose constant load and entered 10 user count for load testing and click on Next button, the test Mix Model screen will be appeared.
6. Test Mix Model:
There are following models for test mix
· Based on the total number of tests
· Based on the number of virtual users
· Based on user pace
· Based on sequential test order
For this load testing, I choose the based on the number of virtual users option and click on Next button, The Tax Mix Screen will be appeared.
7. Test Mix
You can add tests to a load test scenario
Click on Add button à Add Tests popup window will be opened and you can select test from Available tests list and click on OK button.
You can distribute load (in %) among all selected tests and if you want to manually adjust the distribution, simply enter value under % column or use scroll-bar
under distribution column .
If you want to load should be equally distributes among all tests, click on Distribute button
Click on Next button, the Network Mix will be appeared.
8. Network Mix
In Network Mix, you can add one or more network types for load testing and also you can distribute among them (simply enter value or use scroll-bar)
Click on Next button, the browser mix screen will be appeared.
9. browser mix
In browser mix, you can add one or more browser for load testing and also you can distribute load among them (in above pic) I have selected two browser
Chrome and Firefox for load testing and load are equally distributed.
Click on Next button, the Counter Set wizard will be opened.
And click on Finish Button, the Load Test is created and simple open the Load test in Load Test Editor
Right click on root node (LoadTest2) and Select Run Load Test.
I
hope, you enjoyed and Happy Load testing J
Other
related Posts:


2 comments:
Hey Nice blog keep it! up, your blog is very helpful for every person to learn software testing & Thanks for such a knowledgeable post.
Software Testing Services
Software Testing Company
Software Testing Companies in USA
QA Testing Companies
Software Testing Services in USA
Great share! Thanks for the information. Keep going!
Post a Comment